Deconstructing construction....
September 27 - October 3rd -- I have learned more than I ever thought would be interesting about the process of construction. A few things that I have learned are counter-intuitive and worth sharing. One of those things is that some times in the construction process it 'makes sense' to "deconstruct" something that has already been "constructed" -- and, we are not talking about change orders here.
Case in point. The roof has already been completed and passed inspection, however, that was before they reframed the dormer on the south-side of the house to include a missing over-hang that the architect said should have been there when the dormer was built -- maybe over 50 years ago. So, now they are removing the siding from this dormer (which was replaced only about 8 years ago) and they will need to demolish part of the newly shingled roof on the dormer in order to frame the overhang and soffit. It seems that given the many moving parts of this project, it "makes sense" with respect to the cost of logistics and staging to complete the roof when they did, and to now remove part of the shingled roof in order to complete this part of the project.


At the end of the day, here is the new overhang and the new section of roof that will need to be re-shingled.

Similar to this type of logic is the following having to do with paperwork: My public utility has several rebate programs, including one for replacing a less efficient water heater with a more energy efficient one. All I need to do is provide the documentation. Easier said than done as I need to get copies of invoices, signatures from installers, and complete the rebate form. My contractor is really good about helping with this, but he has to get the paperwork from his subcontractors and a copy of the invoice and sometimes signatures on the rebate forms. Apparently, construction types detest anything having to do with paperwork. This morning my contractor told me that if the rebate is for $100, the subcontractor would probably rather just write me a check for $100 than actually complete the paperwork. Who knew?
Back to deconstruction.....since they were going to be installing new siding on the south-side dormer, the contractor, architect and I all decided that we should probably remove the original cedar shingle siding from the north-side shed dormer (that contains the bathroom) and replace it with new siding.
Here is the shed dormer with the painted cedar shingles:
Here is shed dormer sans shingles:
When both dormers are re-sided they will have the same siding, which will pull these elements together.
The mason continues to make progress on the brick ledge -- the idea here is that once the brick is painted to match the rest of the brick on the house, it should look as if this is part of the original brick foundation.
Here is a photo of the back door, rear-entry of the house with the brick ledge (and a weird shadow from the sun as it was low in the very late afternoon sky).

The mason is laying the brick ledge around the house and then he will lay the brick on the wall (below) where the interior gas fireplace will be. Below you can see the vent for the fireplace.


 Here is the brick ledge progress on the rear north side of the house.
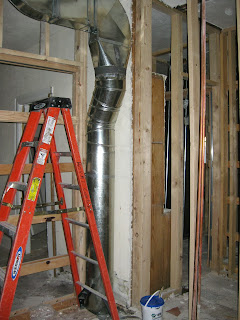
Everywhere there is duct work there needs to be a heat register, or more cutting into the red oak floors.


I had mentioned in a previous post that the soaker bathtub for the new master bathroom had been delivered and was sitting on the front porch. I couldn't imagine how they would get that tub to the upper-level because there is a bend in the original staircase that presents a significant challenge when trying to move large items, such as furniture, to the upper level. Sure enough, there was no way the tub was getting to the upper level by the stairs, so about four guys lifted the tub up and over the covered deck on the back of the house. As evidence, here is the bathtub, in its shipping box, just inside the door to the covered porch in the master bedroom. It should be a breeze now to get it from here into the master bathroom.

If you took note of the date of this post you'll see that it covers several days and that was because I was out of town again. Throughout this adventure, the worst part has been when I had to leave town, and I came home from my travels to a refrigerator with no power (and rotting food)...not once, but twice. Before I left town this time, I was better prepared; I put up a few signs to prevent yet a third surprise.
I had considered adding a skull and cross bones or an attention-getting threat to the signs ("If you remove this electrical cord from this outlet all of your hair will fall out!). I even told the electrician that if there was no power to the refrigerator when I returned that I would probably go "postal!"
I reminded my contractor that I would be away and asked if he would please check on the power to the refrigerator while I was gone. Fortunately, my contractor has a great sense of humor and sent me a text basically telling me that my refrigerator was still running....and taking a tour of my house. I can't express in mere words what a delight it was to return to my house to find the light on when I opened the refrigerator door!


No comments:
Post a Comment